Making Gesso in the traditional way in order to prepare wood or other panels prior to painting, involves a bit of time and effort but the results are worth it if you like to paint on an ivory smooth surface as an alternative to canvas. The following is an account of how I make it, a result of a lot of trial and error to see what suits me but at the same time gets good results.
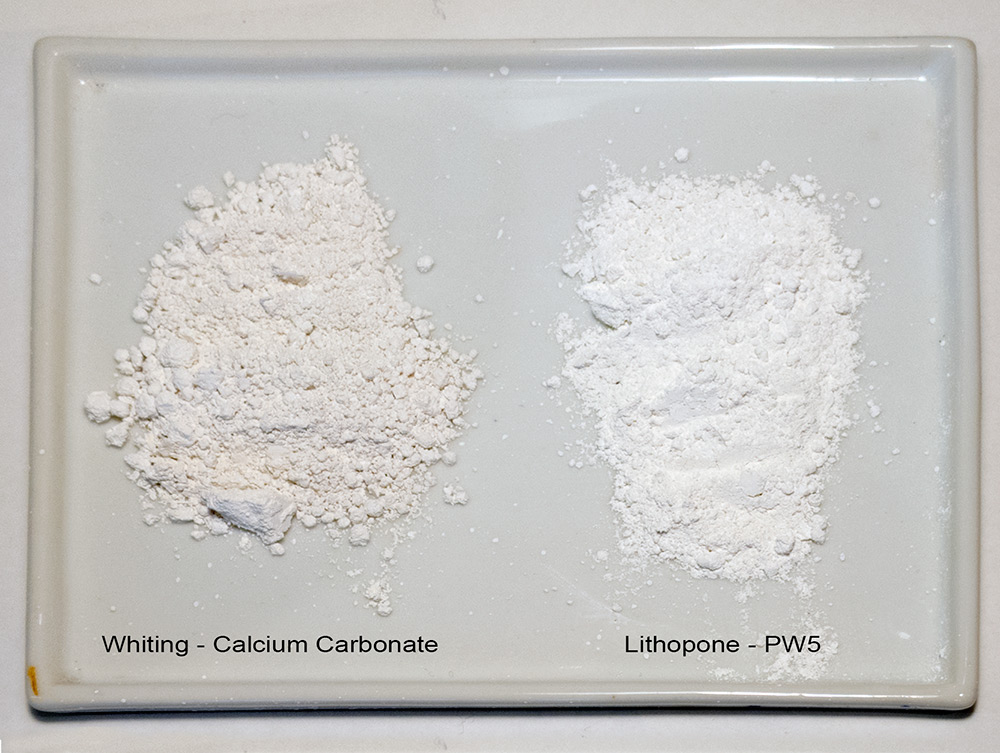
What is Gesso? Essentially gesso is a mixture of a glue solution and a chalk, together with the optional addition of a white pigment for added brightness (I used Lithopone – Pigment White 5, or PW5, a white pigment made from barium sulphate and zinc sulphide) which is then put on in several layers on a firm support – traditionally wood, (although plywood, MDF and even hardboard can be used with satisfactory results) which is then smoothed down to smooth surface ready for painting. What do we need?
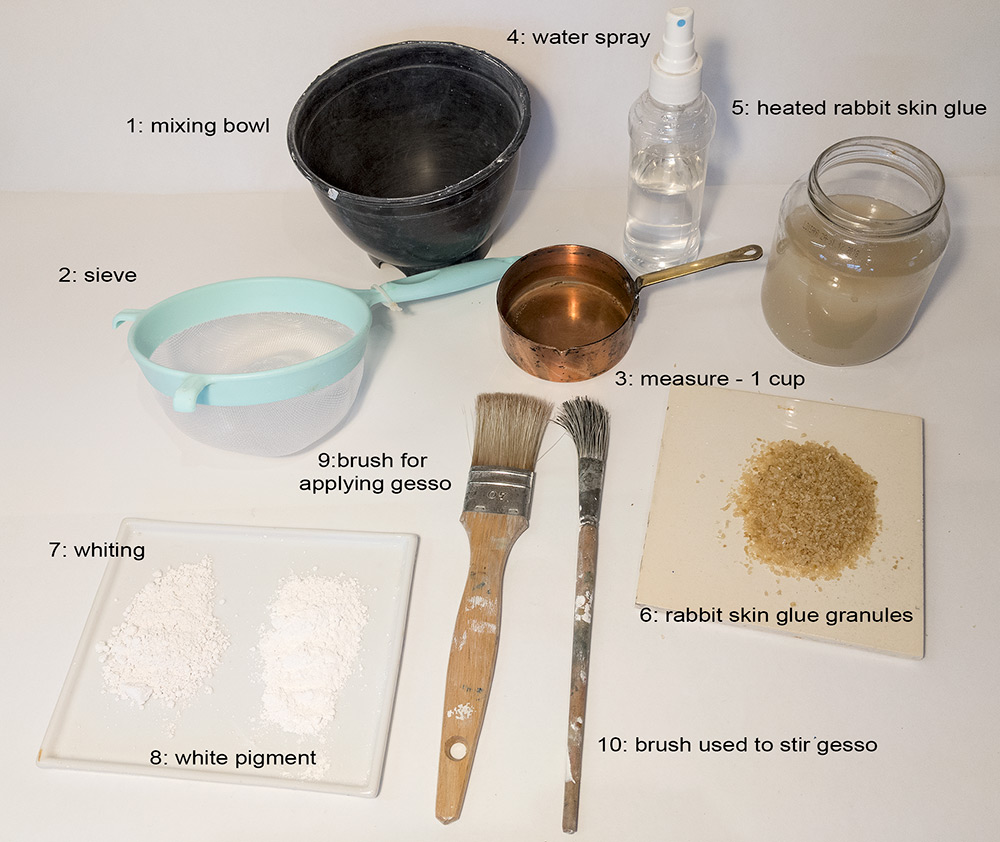
Materials Required
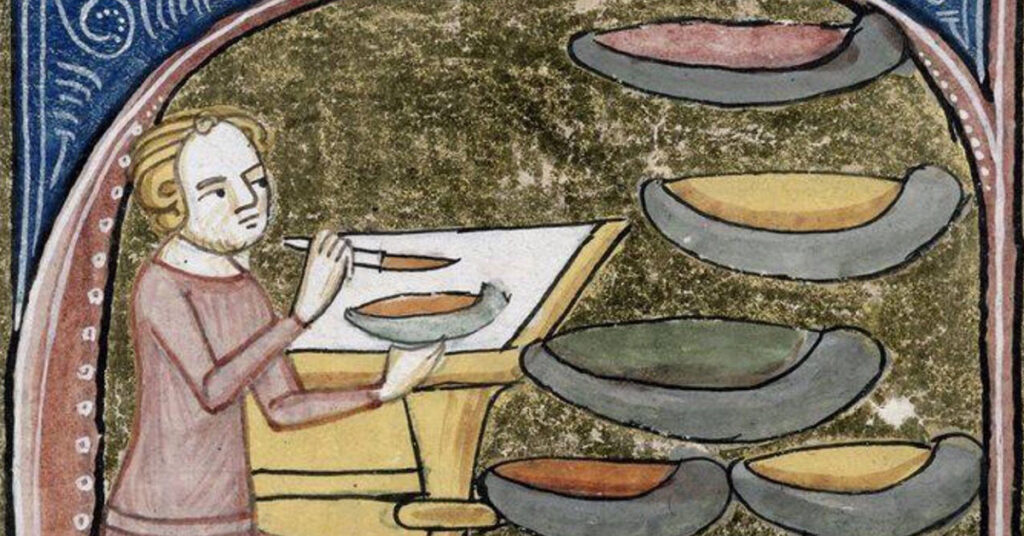
- Glue Solution – I use Rabbit Skin Glue, but others prefer to use a gelatin glue solution. Cennino Cennini in his celebrated “Il Libro dell’Arte” or “Craftsman’s Handbook”, written at the end of the XIV Century, talks of using a hide glue from the neck and other clippings from sheep and goats as being the best source of glue with which to apply gesso to panels.
- Whiting – Calcium Carbonate.
- White Pigment – from either Zinc White, Titanium White, or Lithopone. This is an optional extra if a whiter finished surface is wanted.
- A measure – cup or jug
- Mixing Bowl
- Sieve
- Double-Boiler
- brush for stirring the Gesso
- Brush for applying the Gesso
- Spray bottle for water
Making the Solution
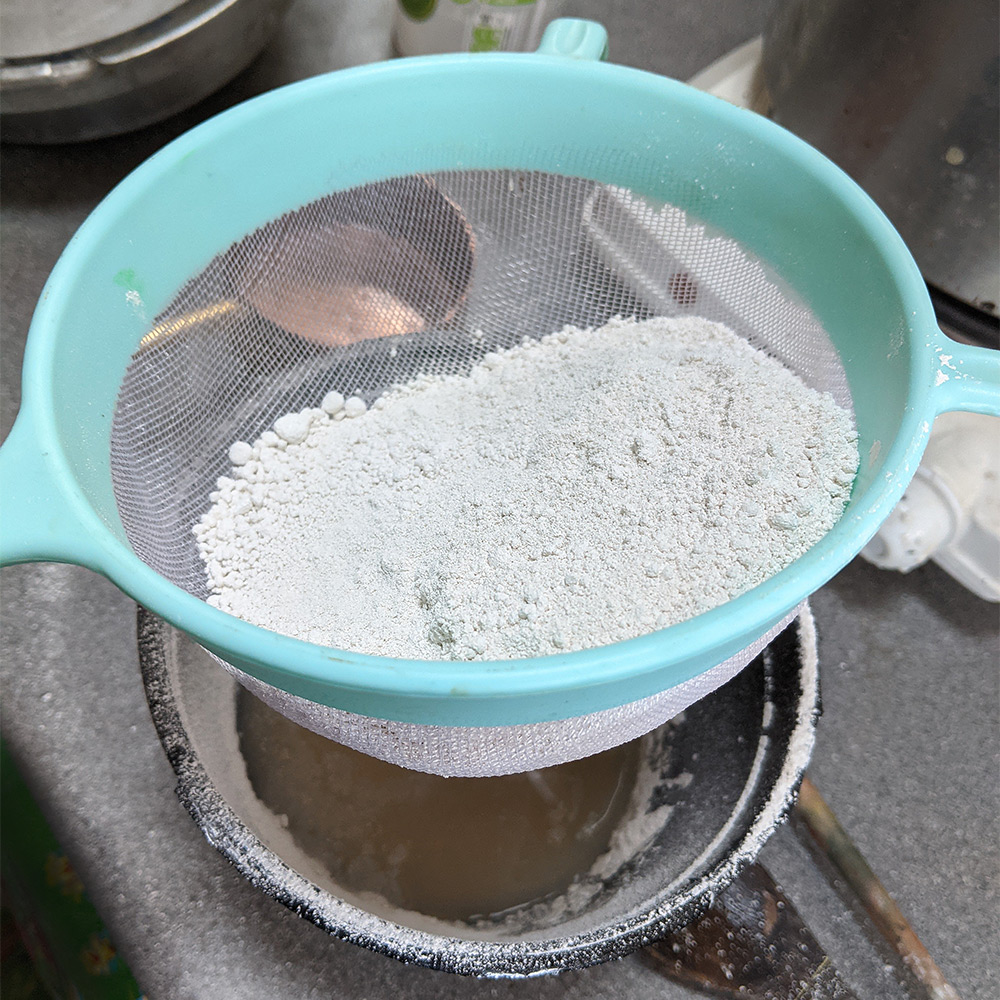
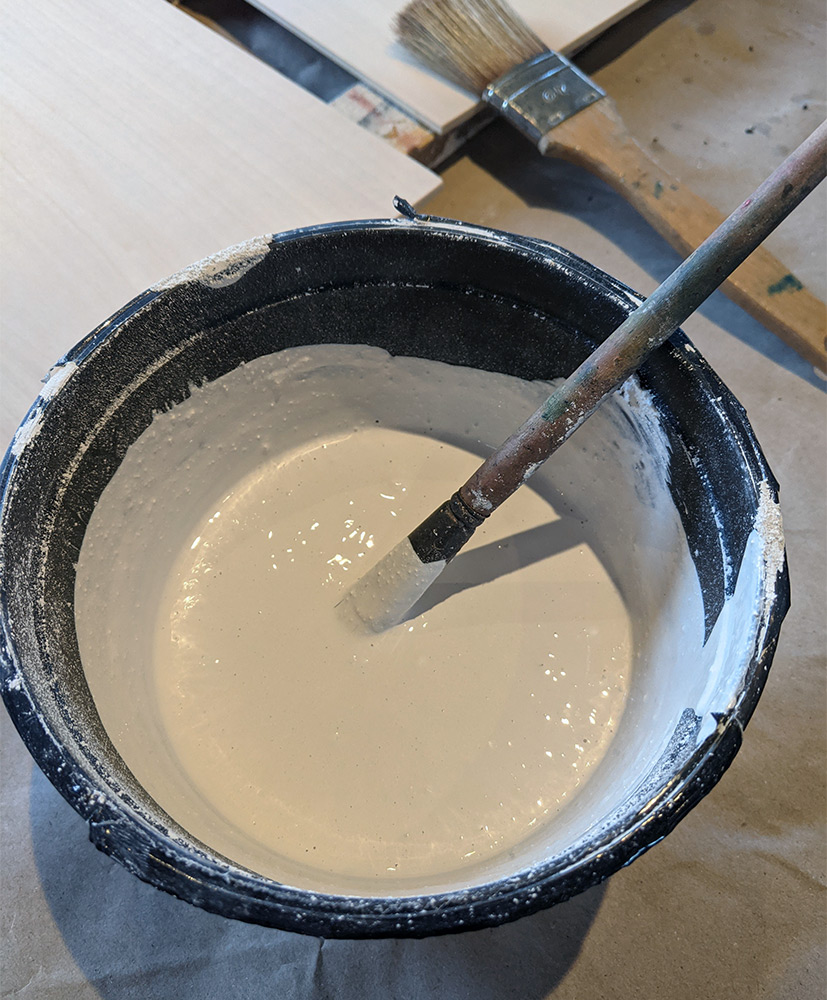
When the glue size is sufficiently hot remove it from the heat source. Having sufficient water in the bottom part of the double-boiler will keep the size solution hot, but not too hot. Then gently sprinkle the whiting and pigment mixture into it, allowing it to sink in naturally and absorb the glue. You could use a purpose-made sieve or simply use a teaspoon. Avoid the temptation to throw in large amounts at once, or they may drag bubbles of air down into the mixture.
Put your brush very gently into the mixture, and move it slowly around the sides and bottom of the dish, gradually turning the material over and mixing it more like ‘folding in’ (but take care to avoid beating it so as not to create any air bubbles in the mixture), until you arrive at something approaching the consistency of cream. You should aim to try and keep this gesso mixture at room temperature, the heat from having sufficient hot water in the double boiler, will help you achieve this. But only let it stand over hot water as long as is necessary to bring it back to a cream like consistency, or you will find your gesso becomes full of air-bubbles
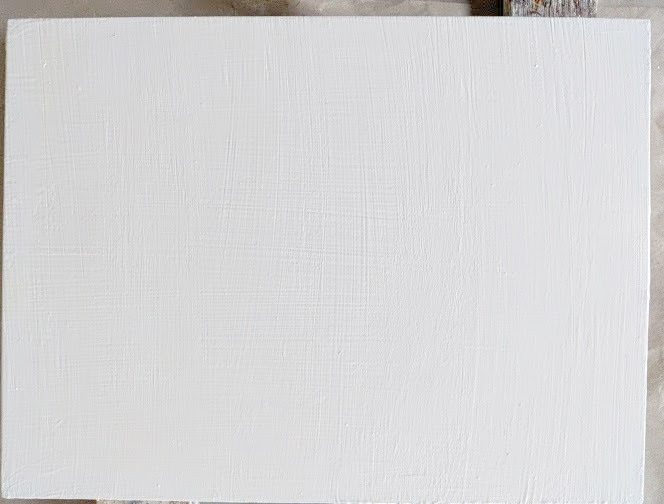
Your aim in applying the gesso is to get on a fairly thick coating of it, as smoothly and evenly as possible. The first layer must be exceptionally thin, stippled rather than brushed on with a full brush, “in such a way that it lays over the ground like a veil”. The best way to achieve this with the first layer, so as to give a solid base is to apply with a brush and then immediately go over the surface lightly with the fingers in a circular back and forth motion, inspecting closely for air bubbles.
The aim is to apply the successive coats of gesso following one after another as rapidly as possible while there is still enough moisture in the previous coats to make the whole lot bind together as a whole. Each subsequent layer is applied as soon as the surface has become sufficiently dry to withstand application with a brush without being picked up by the friction of the brush. The drying time will increase as more layers are applied. You must never apply more gesso to a gessoed panel which has had time to dry completely as the layers will not bind together and risk flaking off.
The second – and first real coat – is applied parallel to and along one edge of the panel. Back and forth strokes can be used but the final smoothing stroke must be made in one direction only. Subsequent layers are applied at right angles to the previous layer, by so doing, building up the covering power of the gesso so that the veins of the wood cannot be seen. As gesso dries, the surface loses its sheen and becomes matte. This is the right time to apply a new coat of gesso. To aid application I sprayed the surface lightly with water, making sure there are no puddles of water. This helped spread the new layer over the surface without adversely affecting the previous layer or the final result. It is most important to have a very light touch and not ‘press’ too hard when brushing on the gesso.
If the gesso thickens throughout the process of applying the layers, add a few drops of water to replace that lost through evaporation, to bring the solution back to a cream like consistency.
With every coat, as a final pass with the brush, lightly dry brush the surface, barely touching it, to eliminate any air bubbles.
There is no set number of layers of gesso that you need apply. Many see 5 or 6 as ample whilst others have many more, but to benefit fully from the gesso surface, a minimum of 4-5 will be required.
This is a messy job and takes time, it cannot be rushed. For these reasons preparing several boards at the same time makes sense.
SMOOTHING THE SURFACE
The newly applied gesso must be left to dry thoroughly, preferably for a couple of days at least to allow it to fully harden, before attempting to finish and smooth the surface, the longer the better.
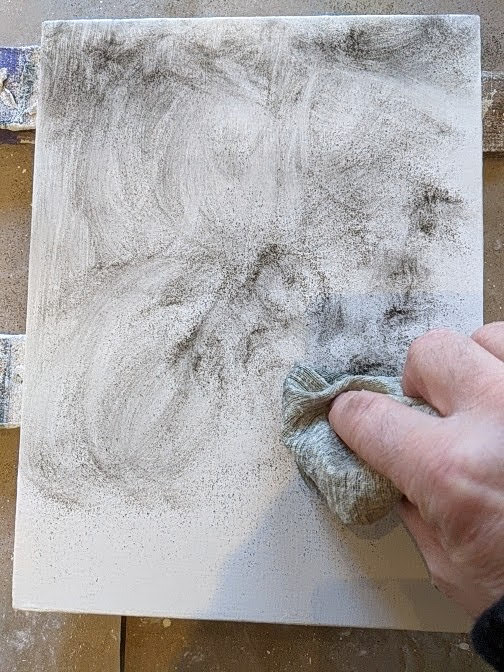
The traditional way of smoothing was to deposit charcoal dust over the surface of the panel using a linen ‘pouch’ containing the charcoal dust, ‘pounced’ over the surface and then spread over the surface with a cloth. A metal blade was then used to scrape over the surface, in a criss-cross fashion always towards you. Where gesso is scraped away, it will show white, and in this way you can tell what imperfections and ridges in the surface need more scraping as you work, until no grey charcoal marks remain on the surface. Do not work over one place too long, but move on and come back to it using a criss-cross motion. A plane blade would be an ideal tool as a scraper. As an alternative to scraping you could use a small whetstone, dipped in cold water, and run it over the gessoed surface, sprinkled with water, using a circular motion. Again, work freely over the surface, not focusing on one spot too long. When dried sufficiently the surface can be sanded even smoother using fine grade sandpaper – you probably will not need to use the sandpaper after scraping. You can of course use sandpiper on its own, but the process is somewhat longer and more time consuming. In this case only use the sandpaper in straight lines, not in a circular movement.
To finish the surface and to give gessoed panel its final sheen like ivory appearance, using a wet cloth go over the whole surface, and polish using the ball of the hand. As a final touch, to avoid any danger of pieces flaking off, slightly chamfer the edges of your panel.
The finished surface of gesso is very absorbent, therefore before painting in oils or even acrylic, you will need to give the surface a coat of glue size to seal it.
Bibliography
- Cennini, Cennino. (c.1390) Il Libro dell’Arte (The Craftsman’s Handbook) (Daniel V. Thompson Trans. 1962). New York: Dover Publications
- Doerner, Max. (1934). The Materials of The Artist. 2nd Edition, 4th Impression (1976) (Eugen Neuhaus Trans. 1963). London: Hart-Davis, MacGibbon
- Massey, Robert. (1967). Formulas For Painters. New York: Watson-Gupthill Publications
- Meyer, Ralph. (1940). The Artist’s Handbook of Materials and Techniques. 5th Edition 1991. London: Faber and Faber
- Thompson, Daniel V. (1962). The Practice of Tempera Painting. New York: Dover Publications